Today:
- How to advance the best AB exercise using 3 techniques.
- A three-minute routine at the end of the video for you.
- PLUS, I placed the 2-minute AB workout VIDEO from Fix a Belly Pooch at the end for you too.
The 3 techniques efficiently and effectively take your lower ab workout to the next and next level.
TIP
Every time you advance, it’s a great idea to go back to the 2 Minute Belly Pooch Video (at the end of the post for you) as it allows you time to focus all the way through each rep of the ab exercise.
You are in complete control of advancing your ab workout at any time. No fancy equipment is needed.
The AB exercise stands on its own, and it also happens to be a part of: The 90 ☀️ Days 5 🖐🏼 SIMPLE Exercises series. A series you can start or RE-start at ANY time. Click the read to learn more.
Learn more: 90☀️ Days – 5🖐🏼 Exercises
All 3 of Today’s Techniques Are Simple
Your body may find that one or all of the advancing ab techniques are NOT EASY for you.
SIMPLE does not mean easy, so please always, always listen to your body.
Use today’s 3 techniques to advance your ab exercise when YOU feel ready to progress.
With 40 years of teaching under my belt- I promise– it is the day-in and day-out CONSISTENCY of making the MICRO Decision to take 2 minutes to exercise your abs that creates results, NOT how fast you progress.
You can return here at any time for a refresher on how to advance.
To make it easy for you to jump to what you want to review, the video section times are listed below the video.
⏰ Times to easily locate sections.
00:00 Intro
02:36 1st technique
04:39 2nd technique
05:16 3rd technique
07:54 AB ROUTINE: 3 Min AB routine
Self Care Tip:
Take a moment every 30 Days to do a focused check-in using the 3 techniques so you can stay on top of advancing your lower abs. (30-day calendar below)
The 3 Techniques to advance your ABs
1- Lower your head support and/or Change your leg positioning relative to the floor.
2- Vary the tempo and reps
3- Intensify the FOCUSED use of your lower abs during your E for E Breathing.
Technique 1 for Advancing the Best Ab Exercise: Head Position & Leg Movement

The first advancement technique is to:
Incrementally challenge the effort it takes to keep your back on the floor.
This incremental challenge can be achieved by:
1st– Lowering your head support a bit if you are using one.
2nd– Lowering your heels closer to the surface WHILE keeping your entire back FLAT.

As your lower abs slowly strengthen, you will be able to use less head support.
Then over time, you’ll be able to lower your heels closer to the floor while:
- rotating from the hip, maintaining the 90-degree position and
- keeping your entire back flat.
As you rotate from the hip, you’ll be incrementally increasing the challenge to your lower ab muscles by slowly lowering a tiny bit further, as in an inch or two.
To find your maximum capability go slow and stop just prior to where it seems impossible to keep your ENTIRE back FLAT on the floor (surface).
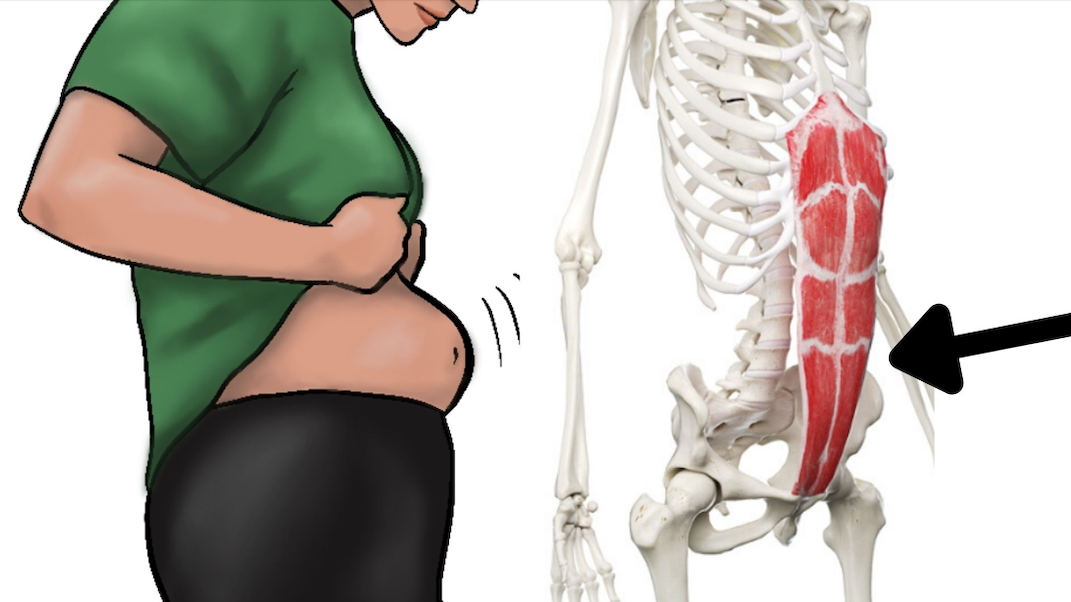
IMPORTANT NOTE: Reducing your head support and going lower is simply a TECHNIQUE to incorporate when the exercise does not push you close to your muscle’s maximum capability.
It is finding the sweet spot where you are
- using the maximum effort
- against the resistance, moving your legs lower to keep your back flat.
This continuous challenge to your muscles improves their strength.
REMIND Yourself Often
The key is finding YOUR sweet spot, which is why I repeatedly ask you to:
Remind yourself that it is NOT how low your head support is or how low your legs go that matters.
It is how well you are working your ab muscles. How close are you using them to their maximum capability WHILE KEEPING your ENTIRE back FLAT.
The original post where we walk through the positioning:
Positioning is Everything
Using your head and leg positioning creates an ongoing weighted challenge for your abs and is what makes this the most efficient and effective lower ab workout.
Technique 2: Vary the Tempo and Reps
Your Current Tempo
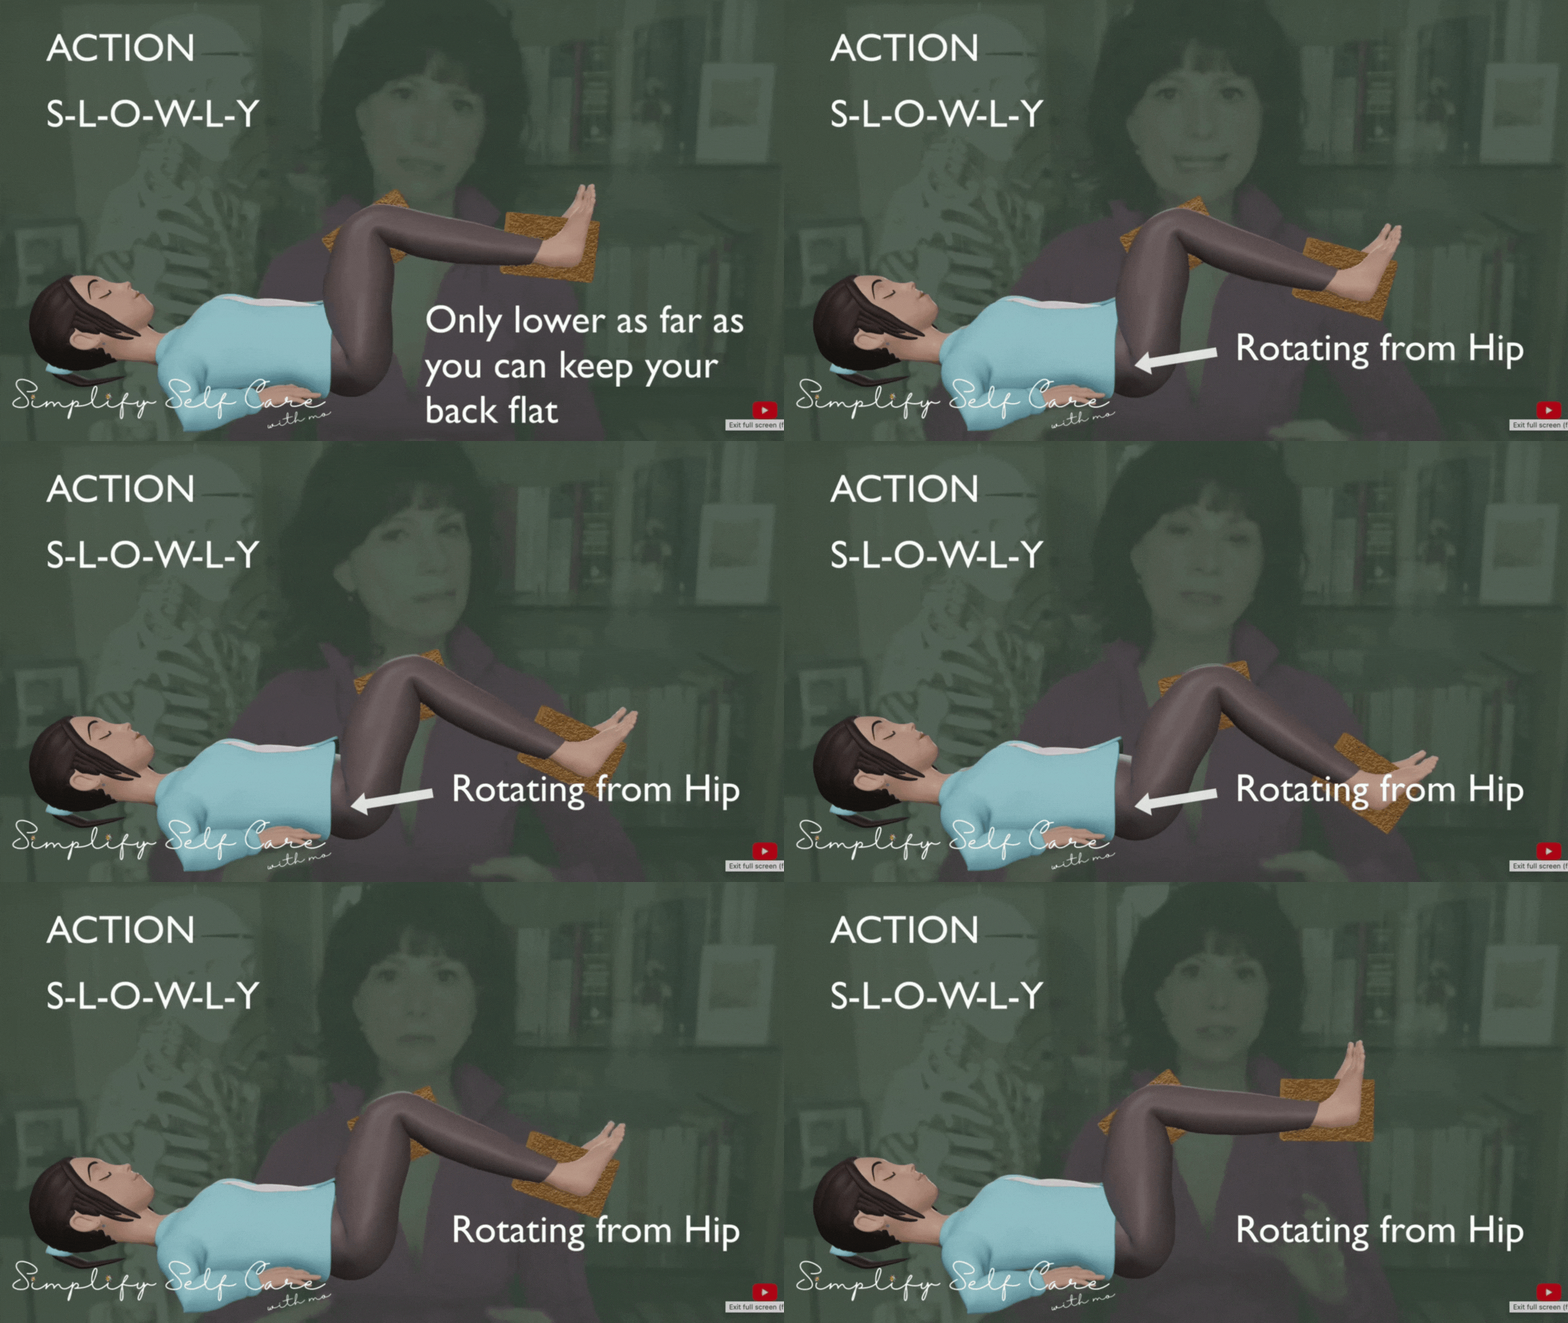
Advance by Slowing the Tempo
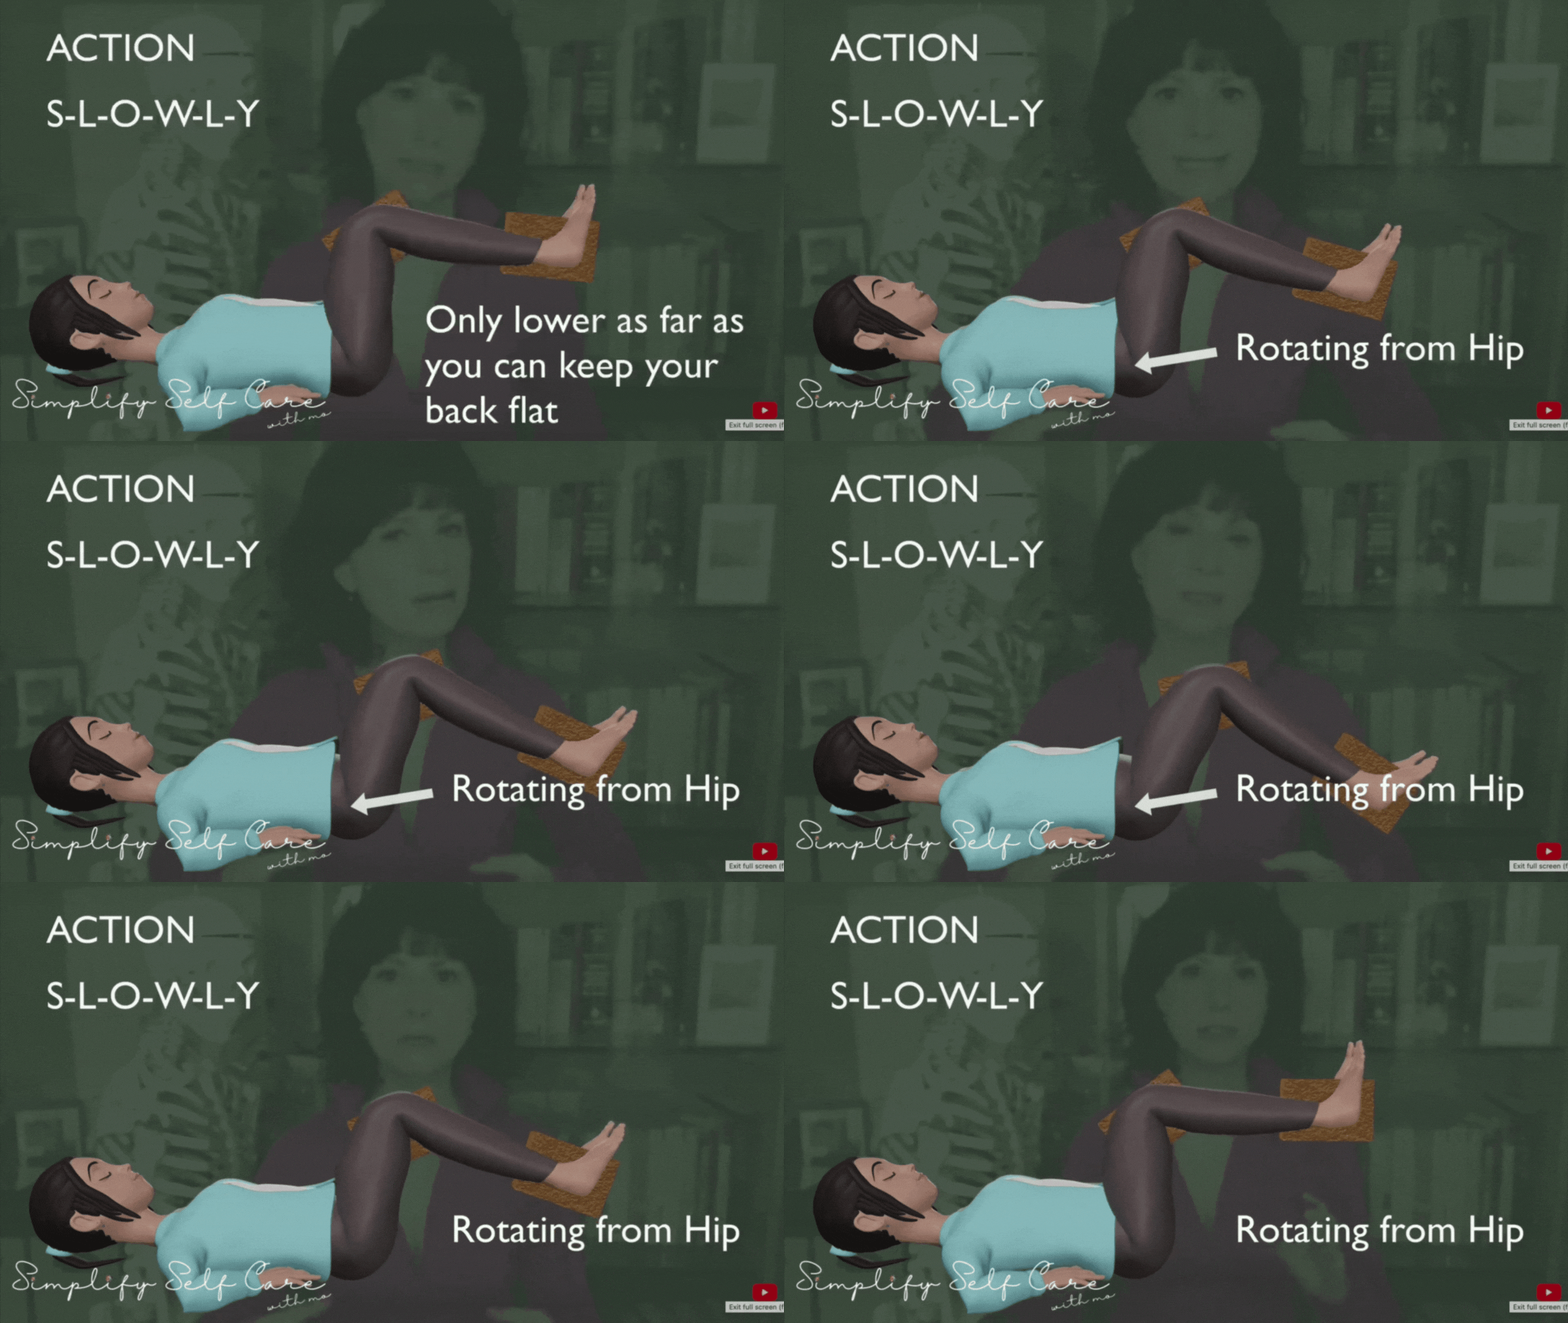
Vary the tempo and change the reps WORKS!
The slower you go, the more work your muscles will engage in.
You may feel the need to reduce the reps. If that is the case, that’s perfectly fine. Your new challenge will be to increase the reps over the days and weeks.
As ALWAYS: you do you.
Lowering the number of repetitions and taking on the challenge of the slower tempo continues to provide what you need to progress.
FYI: In the 3-minute ab routine at the end of today’s post video we:
- start with a nice slow 8 count
- then we increase the tempo to 3 down and 3 up count
- slowing down to the 8 count again for a few more reps as we wrap up the exercise.
Technique 3: Intensify the FOCUSED use of the lower 1/3 of your abs during E for E breathing.
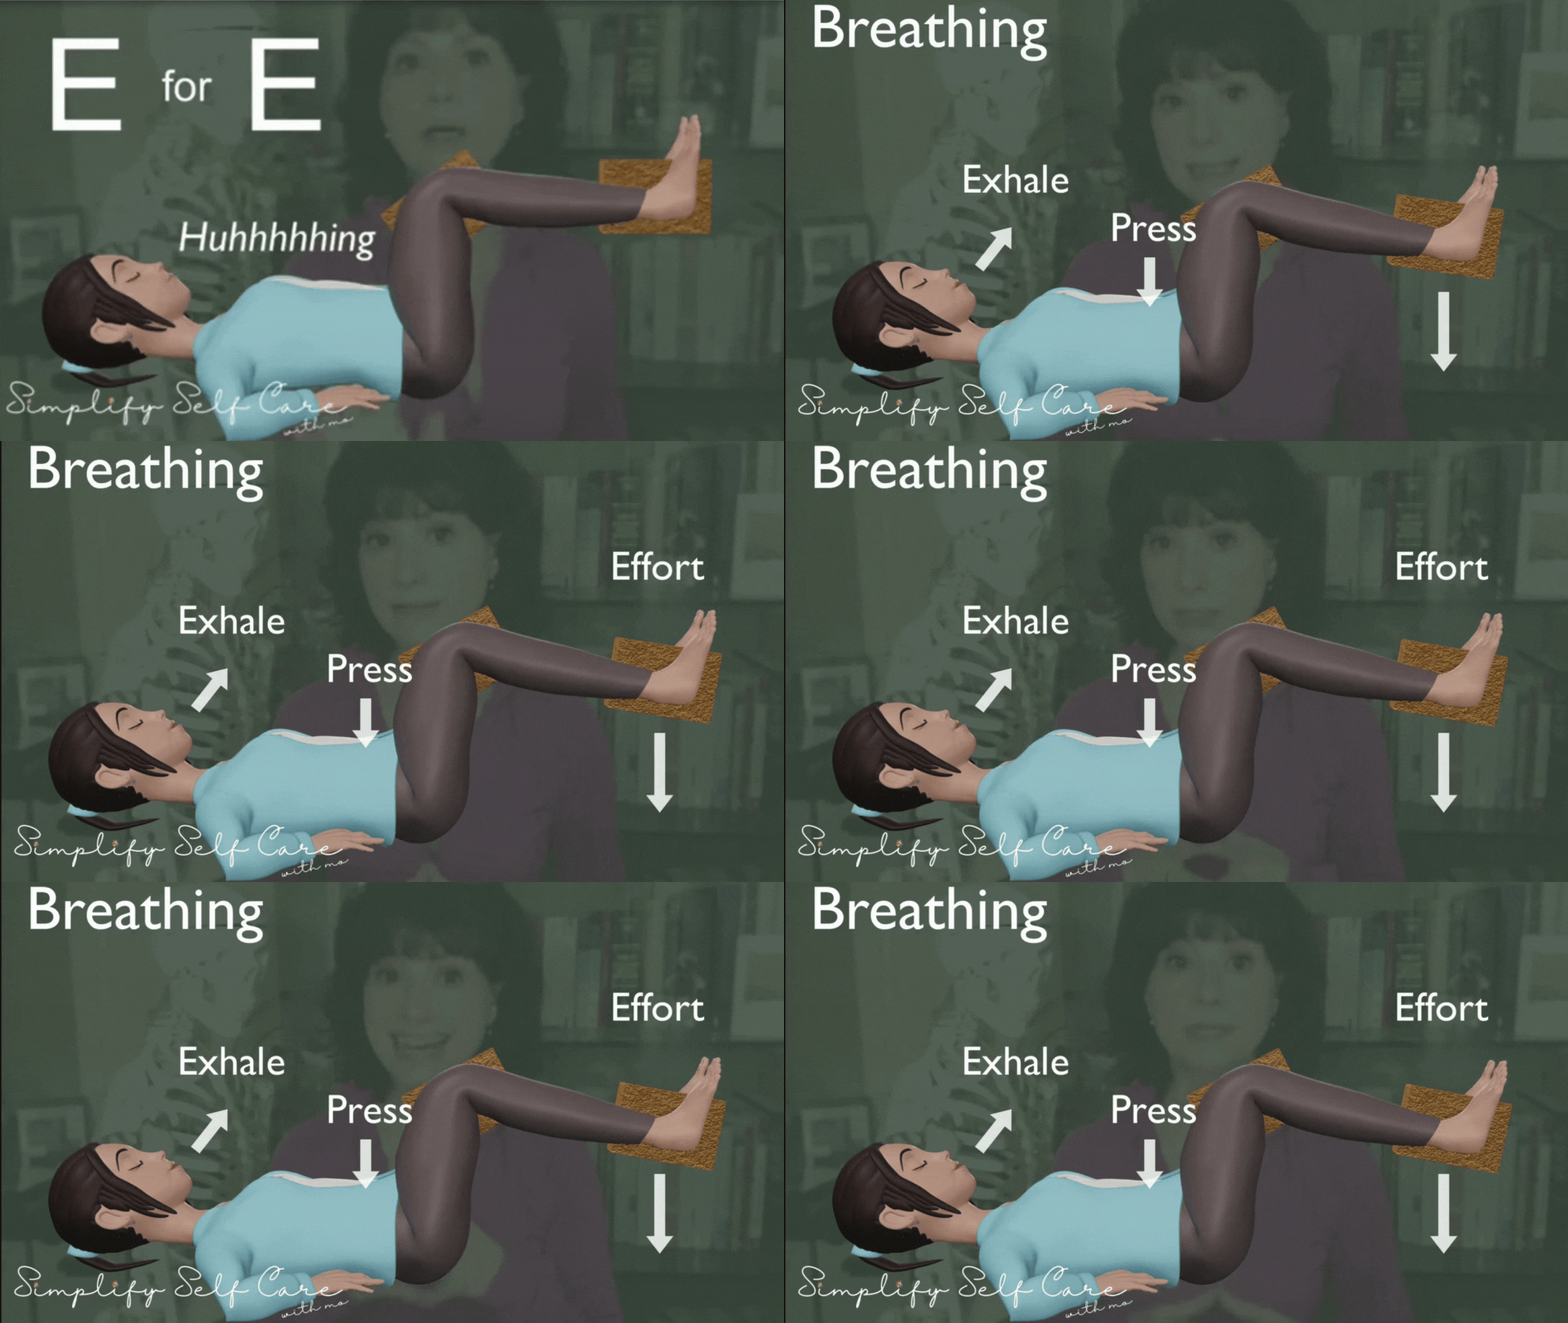
This 3rd advancement technique is to accentuate your lower ab contraction during the effort phase of your exercise.
If you are not sure what intensifying the lower 1/3 using our E for E breathing means, you can learn about The E for E technique as well as the reason it works so amazingly in the POST: Train This 1 Muscle First.
For understanding exactly WHAT the 1 Muscle does and HOW it Improves so many common conditions PLUS Step by Step HOW to locate it so you can train it- All that is in the post: E for E
So technique 3: Intensifying the FOCUSED use of the lower 1/3 of your abs during E for E breathing is amazingly helpful when it comes to advancing your ab work.
This is because it helps you stabilize your torso, which will help you to be able to lower your legs further while still maintaining your flat back.
When you use the E for E breathing in this exercise position, think of it as:
Your belly button trying to meet your spine.
As your lower ab gets more practice pressing the air up and out of your lower abdominal cavity, your diaphragm (your body’s most important muscle for low back stability) and pelvic floor muscles become stronger and stronger as well.
IMPORTANT TECHNIQUE NOTE: Pressing your air out by flattening your abs is different from sucking air in.
Take a moment when you are in your position and double-check that you are flattening your lower abs by pressing your air up and out of your belly area. And that your breath is coming up and out of your open mouth due to the use of the lower 1/3 of your abs.
TIP: When you get really good at using Technique 3, The Exercise Gets HARDER!
YUP! After incorporating the focused E for E breathing technique for a while and the 2nd or 3rd time you practice advancing, you can expect that the exercise feels more difficult as the weeks go on.
This is because you are getting better and better at using the exercise to its fullest potential. So congratulate yourself and add an EXTRA plus on your Micro Decision counter for recognizing it is an improvement! Your brain will thank you.
Don’t forget to Celebrate when it feels more challenging! Take that as a sign of progress! Congratulate yourself!
The 30-day pdf and 2 Min Ab Routine for You


The Simple Self Care Lifestyle
MOtivator APP
Learn more: 90☀️ Days – 5🖐🏼 Exercises
🔗 90☀️ Days 🖐🏼 Exercises Week 3 Daily Routine
The Simple Self Care Lifestyle
When you find out how achieving 1 GOAL will make every other health, wellness & fitness GOAL that you have achievable- it SIMPLIFIES everything.
(mo)
THe simple self care lifestyle
Simplify
self care
Post categories


SHOP Products
Personal Products
Healthy Home
Quality Supplements
Things to Keep Handy
Quality Food Sources
Simple Self Care Programs


